Building a Giphy-Searching App in GTK+ 3
Web applications get all the hype these days, so why not buck the trend and build a desktop application instead? In this post I’m going to use Vala and GTK+ to build a simple desktop program for searching Giphy, the popular GIF database.
NOTE: Windows and Mac users should be able to build the example programs here by using Vala for Windows and Homebrew respectively, but I haven’t tested it, so YMMV.
To whet your appetite, here’s a preview of what it is that we’re actually trying to build:
Full source is provided at the end of Part III.
Functionally, this app isn’t too complicated. You type in a search term, hit Enter, and it will look up and display a random GIF matching your query along with the URL. Giphy provides an endpoint for this, so all we have to do is build the UI around it.
Setting Up
This post is going to be focused on GNOME technologies, so you need to have the necessary runtime and development libraries installed, and know the basics of using a command line to compile code.
To begin, you will need to install the Vala compiler (I’m using 0.28.1), and development libraries for the following packages (my version listed as well, but other versions should work too):
-
gtk+-3.0(3.16.7) -
libsoup-2.4(2.50.0) -
json-glib-1.0(1.0.4)
You can make sure they’re installed properly by running pkg-config --modversion <package>, and if you get a message telling you that the package wasn’t found,
then you are missing the development tools.
About Vala and GNOME Development
Why am I targeting GNOME? Frankly, because it’s what I use (currently running GNOME 3 via openSUSE Leap; go check it out if you haven’t heard of it!), and the GNOME API’s are actually fairly pleasant to work with.
If you’d like, this entire application can be written in pure C (as opposed to the Qt framework which requires C++), but another benefit of targeting GNOME technologies is that it has its own C#-inspired language that compiles to C: Vala. As a result, applications written in Vala are just as fast as those written in C, but you get a language whose usability is on par with Python.
Running the Examples
Each part comes with a tar archive containing the source code that summarizes
what was covered. Each example archive contains two files: the Vala source code,
and a Makefile. To run each one, extract the contents, cd into the folder,
and execute make run. Assuming your development environment is set up correctly,
the application will build and run.
Part I: Hello World
GNOME applications are beginning to make a distinction between two scopes: application-level and window-level. It’s no big surprise that you can have multiple windows of an application open at a time, and GNOME is embracing that usage pattern by allowing you to separate the concerns of the application on a global level with those that are only concerned with one window at a time.
For example, imagine that our app is already built. If you’d like to do two searches at the same time, say to compare results, you’d open up two windows. Each window would contain the search field, and the image result. However, for efficiency’s sake, any resources that are shared between the two windows would ideally only need to be allocated once. Plus, it usually makes more sense to handle application configuration globally.
Because of this, the application will be broken down into three parts:
public class Window : Gtk.ApplicationWindow {
    ...
}

public class Application : Gtk.Application {
    ...
}

int main(string[] args) {
    return new Application().run(args);
}
From top-to-bottom, these sections are:
-
The
Windowclass. This represents a single open instance of the application, and will contain the bulk of the code when we’re finished. -
The
Applicationclass. This represents the global state of the application. -
The
mainmethod, which is the entrypoint for Vala programs. This part is already basically complete, as all it does is instantiate theApplicationclass and start it running.
Note that Vala’s syntax means that Window extends the ApplicationWindow class defined
in the Gtk namespace, and Application extends the Application class defined in the
Gtk namespace.
Now let’s see how the window and application are defined:
public class Window : Gtk.ApplicationWindow {
    public Window(Application app) {
        Object(application: app, title: "Search Giphy");
        this.show();
    }
}
Note that we define the constructor to accept an instance of our Application, through
which we’ll be able to reference any available global state.
The Object(...) line is a little weird for those unfamiliar with GObject and Vala,
but the short of it is that it’s Vala’s syntax for assigning multiple properties at
once during construction. In this example, we just specify the window’s application
instance (required) and a title (optional). Lastly, we tell GTK+ to show the window.
Application is similarly short:
public class Application : Gtk.Application {
    public Application() {
        Object(
            application_id: "com.damienradtke.giphy-searcher",
            flags: ApplicationFlags.FLAGS_NONE
        );
    }

    protected override void activate() {
        new Window(this);
    }
}
Application requires two properties to be filled in: a global application id,
and a set of application flags. Note that the application id can be whatever you want,
so long as it’s unique, and conforms to the application id syntax. Most of the
time, you’ll probably just want FLAGS_NONE for the application flags, but there are some
adjustments you can make to the application’s behavior by adding
additional flags, separated by |.
If you run this, you should see a window pop up:

Part II: Actions, Signals, and HTTP
Okay, now we can start getting in to the fun stuff. First, let’s add a simple text entry widget to the window so that we can start playing with it:
public class Window : Gtk.ApplicationWindow {
    protected Gtk.Entry search_entry;

    public Window(Application app) {
        Object(application: app, title: "Search Giphy");

        this.search_entry = new Gtk.Entry();
        this.add(this.search_entry);

        this.show_all();
    }
}
If you run this now, you should see a smaller window composed entirely of a single text entry field. Obviously not ideal for the final design, but it’s all we need to move on to learning about actions and signals.
Signals (not the Unix kind)
Signals are the means by which GTK+ applications operate. GLib is an event-driven toolkit, which means the application will sit idle until some event occurs that requires it to take action. Every single action you take, such as pressing a key or moving the mouse, generates a signal, and every signal can have callbacks connected to it (not unlike event listeners in Javascript). Most of the signals emitted during an application’s lifetime will be ones defined by GTK+ itself, but it’s also possible to define your own, essentially utilizing GLib itself as a general-purpose notification system.
In the above code, we create a new text entry widget and add it to the window.
However, it’s not very useful unless we can react to it; in this case, we want to know
when the user presses Enter. Since this isn’t Javascript (zing), all we need to do
is connect a callback to the entry’s activate signal:
this.search_entry = new Gtk.Entry();

// Listen for the user's Enter key.
this.search_entry.activate.connect(() => {
    stdout.printf(
        "search entry powers, activate! form of: %s!\n",
        this.search_entry.get_text()
    );
});

this.add(this.search_entry);
Note how the syntax here works for listening to a signal. Signals are available directly
as properties of the object (unlike in C, where signals are referenced as strings),
so we add a callback by calling the signal’s connect() method and providing it one.
The callback provided in this example uses Vala’s closure syntax, but it can
be a function reference too. Inside the callback, we print out a message using the value
of the text field.
Actions
Now that we can react to user input, we need to figure out how exactly to do that. In addition to custom signals, GLib also provides a way to define what actions can be taken by our application. An action represents a higher-level view of user input than signals do, and are also used to build application and window menus. We won’t be building any menus here, but we still want to formalize the action in order to decouple it from the widget.
At the top of the Window constructor, let’s define an action. Note that this is intended
to be a window-level action, and not an application-level one:
public Window(Application app) {
    Object(application: app, title: "Search Giphy");

    // Register window actions.
    // This defines an action called "search-random"
    // that exepects a string parameter.
    var search_random = new SimpleAction(
        "search-random", VariantType.STRING
    );
    search_random.activate.connect(this.search_random_cb);
    this.add_action(search_random);

    // Search entry code goes here.
    ...
}

protected void search_random_cb(Variant? parameter) {
    ...
}
Not terribly difficult. Each action requires a name (by convention, one that’s hyphenated
and lower-case), and the type of the parameter that expects, which can be null if it
doesn’t expect any parameters. The action’s activate signal is then connected to the
search_random_cb method, and the action is registered to the window.
Note the use of Variant and VariantType in this code. Because Vala compiles to C; and in
particular, GObject-based C; action parameters are provided as a Variant.
When we define the action, we tell GLib that its parameter should be a Variant that contains
a string value, and in the callback, we take a single value of type Variant?. The additional
question mark simply means that it’s a nullable value.
Even though we defined the action as one that takes a string, we still need to use the Variant?
type in the action callback, otherwise the code won’t compile. Fortunately, we can use assertions
to make the intent of this function clear, without having to scroll through the code to locate
the original action definition:
protected void search_random_cb(Variant? parameter)
    requires(parameter != null)
    requires(parameter.is_of_type(VariantType.STRING))
{
    // String value accessed via `parameter.get_string()`.
    ...
}
This is a feature of Vala called contract programming, and it’s a handy way to make sure that any unexpected conditions, such as invoking the action with an invalid parameter type, are called out as such, resulting in a much clearer and easy-to-understand error message.
Now that we have an invokable action, we can go back to the search entry code and tell the application to invoke our new action whenever we receive some user input. We can tell GLib to emit a signal by calling it as if it were a function:
// Invoke the "search-random" action when the user hits Enter.
this.search_entry.activate.connect(() => {
    // Emit the action's "activate" signal, providing the search
    // entry's contents as its parameter.
    search_random.activate(this.search_entry.get_text());
});
Defining Custom Signals
We defined the “search-random” action as a way to decouple it from the widget that actually kicks it off. Now we’re running into the reverse problem; how do you update the application’s interface based on the results of an action without re-coupling the action back to its widgets? Answer: define custom signals that will be emitted by the action, and listened to by the widgets.
Let’s define a couple signals that will come in handy later:
public signal void search_begin(string tag);
public signal void search_end(string? url, Error? e);
Defining a custom signal only takes one line of code, which is its name and signature.
Once they’re defined, they can be listened to with .connect() and emitted by calling them
as if they were regular functions.
These signals answer two questions that the interface will care about: when is a search being
kicked off, and when has the search ended? In part three, we’ll cover how to listen to these
signals to update the UI; for now, we’re strictly interested in how and when they’re emitted.
Note that the parameter names indicate that we want to search Giphy by tag, and we want the result
as a URL to a .gif image.
Searching Giphy
Before we get started implementing the “search-random” action, we need to make one important change to the signature of the callback:
protected async void search_random_cb(Variant? parameter)
    requires(parameter != null)
    requires(parameter.is_of_type(VariantType.STRING))
{
    ...
}
Adding the async keyword identifies this method as an asynchronous one.
Because the whole point of search_random_cb() is to query Giphy’s API, it needs to be
asynchronous in order to avoid locking up the whole GUI while waiting for results.
Writing asynchronous code in Vala is extremely similar to plain ol’ synchronous code,
and is exactly the same for the parts that aren’t themselves dealing with other asynchronous
code.
First, let’s define the basic structure of the callback:
protected async void search_random_cb(Variant? parameter)
    requires(parameter != null)
    requires(parameter.is_of_type(VariantType.STRING))
{
    var tag = parameter.get_string();
    this.search_begin(tag);

    // Capture any errors that may be thrown during the search.
    try {
        string url = ...
        this.search_end(url, null);
    }
    catch (Error error) {
        this.search_end(null, error);
    }
}
This sets up the action to properly invoke the search_begin and search_end signals.
At the beginning of the search, we invoke search_begin with the search term we’ll be
using. Later on, no matter what happens, search_end will be invoked, either with the
URL we want and a null error, or a null URL and an error value.
That’s all we care about as far as result and error handling. Displaying either the
resulting .gif or an error message is a task for the GUI, which we’re not interested
in for the moment.
Introducing Soup
libsoup is GNOME’s HTTP client/server library that integrates directly with GLib. To
use it, we first need to create a session instance.
Soup sessions are a great example of a resource that can be shared across all instances
of the application; unless you’re building something that requires multiple independent
authentication contexts, it’s best to define it as part of Application and not Window,
so that we only need to allocate one.
Let’s rewrite our Application class a little bit:
public class Application : Gtk.Application {
    /*
     * A Soup session for making HTTP requests. It's part of the
     * global application so that it can be reused by any window.
     */
    public Soup.Session session { get; private set; }

    /*
     * Declare a couple read-only properties.
     */
    public unowned string giphy_host {
        get {
            return "http://api.giphy.com";
        }
    }

    /*
     * Giphy's public API key.
     */
    public unowned string giphy_api_key {
        get {
            return "dc6zaTOxFJmzC";
        }
    }

    public Application() {
        Object(
            application_id: "com.damienradtke.giphy-searcher",
            flags: ApplicationFlags.FLAGS_NONE
        );

        // Create a libsoup session.
        this.session = new Soup.Session();
    }

    protected override void activate() {
        new Window(this);
    }
}
Notice how I not only added the Soup session instance that we wanted, but I also snuck in a couple properties that will be used later on.
Now that we have a session that we can use, let’s revisit search_random_cb
and finish up its implementation. Note how we access the global Application
instance using the window’s application property to retrieve global
properties and access the global Soup session:
protected async void search_random_cb(Variant? parameter)
    requires(parameter != null)
    requires(parameter.is_of_type(VariantType.STRING))
{
    var tag = parameter.get_string();
    this.search_begin(tag);

    var app = (Application)this.application;
    var uri = new Soup.URI(app.giphy_host + "/v1/gifs/random");
    uri.set_query_from_fields(
        "api_key", app.giphy_api_key,
        "tag", tag
    );

    try {
        // Send a request to the endpoint and open up the response
        // stream, wrapping it with a BufferedInputStream to make
        // reading it easier.
        var req = app.session.request(uri.to_string(false));
        var stream = new BufferedInputStream(
            yield req.send_async(null)
        );

        // Asynchronously read the data from the input stream into
        // a string builder. Later on, this data will need to be
        // parsed as JSON so that we can get a .gif URL from it.
        var result = new StringBuilder();
        ssize_t size;
        while ((size = yield stream.fill_async(-1)) > 0) {
            result.append_len((string)stream.peek_buffer(), size);
        }

        // Notify the window that a search has completed.
        this.search_end((string)result.data, null);
    }
    catch (Error error) {
        this.search_end(null, error);
    }
}
There’s a lot going on here, but it’s actually not very complicated. This code can be thought of as having three parts:
-
Build the request URI.
-
Send the request and wait for a response.
-
Read the response into a buffer.
Building the URI uses Soup’s URI type to add query parameters, which
is safer and more reliable than simply appending to a string, but is
otherwise very straightforward.
Now, note the use of the yield keyword, each one followed by a method
that ends in _async. Asynchronous Vala code works by running the method
as normal until it encounters a yield; when it finds one, it calls the
following method in a way that allows the application to focus on other
things until that call is complete. It essentially behaves the same as if
the code were written with manual callbacks, but the callbacks are all
flattened into a single function, making it as easy to write and reason
about as if everything was happening synchronously.
If you run the example code for this part, type in a search term, and hit Enter, you should eventually see Giphy’s API output in your terminal, while the GUI stays 100% responsive to the user.
Part III: Decode, Download, Display
The previous section left us with an app that should successfully query Giphy’s API and get a result. The first thing we need to do after that is figure out how to use it!
Like many web services, Giphy’s result is serialized as JSON, so reading
it isn’t too tricky; we just need to pull in the json-glib library
(this code replaces the “read the response into a buffer” step in the
previous implementation, right after we retrieve the response stream):
var parser = new Json.Parser();

// Read the JSON data and extract its root.
yield parser.load_from_stream_async(stream, null);
var root = parser.get_root().get_object();

// Verify that the response status is 200 OK.
var meta = root.get_object_member("meta");
var status = meta.get_int_member("status");
if (status != 200) {
    // We received an unexpected response, so report the error.
    this.search_end(
        null,
        new GiphyError.QUERY(meta.get_string_member("msg"))
    );
    return;
}

var data = root.get_member("data");

// Quick sanity check. Giphy returns an empty array if
// there were no results.
if (data.get_node_type() != Json.NodeType.OBJECT) {
    this.search_end(null, new GiphyError.NO_RESULT("No result."));
    return;
}

var url = data.get_object().get_string_member("image_url");
this.search_end(url, null);(format of the expected response)
One new thing you’ll notice here is the use of a GiphyError type. That’s
quickly and easily defined by creating a new error domain, which is
essentially Vala’s method of creating new Exception types:
/*
 * Define a custom error type so that we can report an error if
 * the response doesn't meet our expectations.
 */
errordomain GiphyError {
	QUERY,
	NO_RESULT
}
Huzzah, now our search_end signal will return the URL to a .gif file!
There’s just a couple things left to do: download it, and display it.
Download Me a River
For downloading it, we’ll add a couple more signals:
public signal void download_begin(string url);
public signal void download_progress(double percent);
public signal void download_end(
    Gdk.PixbufAnimation? animation,
    Error? error
);
We’re following the exact same pattern as we did before, except this time, we’ve added a progress signal. Rather than use Soup directly, though, the download is going to utilize GIO (GLib’s virtual filesystem API), which enables progress updates for file transfers, including downloads. Since the file is much bigger than the API’s JSON response, it’s good practice to update the user with some concrete percentages as soon as we have them available.
To start, let’s define another asynchronous method for fetching the .gif
(warning: this method is long-ish):
protected async void download_gif(string url) {
    this.download_begin(url);

    try {
        // Create a reference to the remote .gif.
        var remote_file = GLib.File.new_for_uri(url);

        // Create a new temp file to download it to. We won't
        // actually use the iostream, but it needs to be non-null.
        FileIOStream iostream;
        var tmp_file = GLib.File.new_tmp(
            "giphy-XXXXXX.gif",
            out iostream
        );

        // Asynchronously download the .gif to the temp file.
        yield remote_file.copy_async(
            tmp_file,
            FileCopyFlags.OVERWRITE,
            Priority.DEFAULT,
            null, // Cancellable instance
            (current, total) => {
                this.download_progress(
                	(double)current / (double)total
                );
            }
        );

        // File's downloaded, read it into memory.
        var stream = yield tmp_file.read_async();
        var image = yield (
            new Gdk.PixbufAnimation.from_stream_async(stream, null)
        );

        // We now have the result, signal the application!
        this.download_end(image, null);

        // We're done with the temp file, so delete it.
        // Comment this line out if you'd like to keep
        // everything you've found while searching!
        // They show up in your sytem temp folder.
        yield tmp_file.@delete_async();
    }
    catch (Error error) {
        this.download_end(null, error);
    }
}
Again, this looks like a lot, but there’s only a couple steps here:
-
Create a temporary file.
-
Copy the remote
.gifinto it, signaling progress along the way. -
Read the temporary file into memory.
Note: there is a way to download the .gif directly into program memory,
which is a little more efficient, but that approach doesn’t support monitoring
the download’s progress.
Last, but not least, we need to put together the interface that will listen to all these signals, and show us what we want to see.
It’s GUI Time
We have the data, but it’s not going to be very useful unless we can show it to someone! It is possible to use a design tool like Glade to help out (and for your bigger, more serious projects, it’s a better option than what I’m doing here), but instead, we’re just going to lump the whole UI into a single block of code.
First, let’s think about what we need. At its simplest, all we need is a search box, a place to put the image, and a place to put the image’s URL. That corresponds to these widgets:
However, in order to make the app a lot more user-friendly, I’m going to throw in a couple more:
The progress bar will be used to display search/download progress, and the stack is a layout widget that makes it easy to toggle the UI between two or more different states. In this case, we want to replace the image with the progress bar when a search is underway.
First let’s define everything we need as instance variables, so that they’ll be available to the methods that need them:
protected Gtk.Entry search_entry;
protected Gtk.Stack image_stack;
protected Gtk.Image image_view;
protected Gtk.Entry image_view_url;
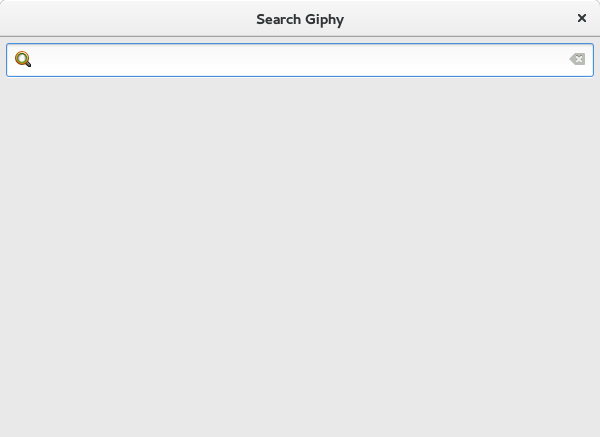
protected Gtk.ProgressBar image_view_loading;And now, inside the Window constructor (warning: this is a big chunk of code, but all it’s doing is creating widgets):
/* -- Build the UI -- */

// Search Entry
this.search_entry = new Gtk.Entry();
this.search_entry.activate.connect(() => {
    search_random.activate(this.search_entry.get_text());
});
this.search_entry.set_icon_from_icon_name(
    Gtk.EntryIconPosition.PRIMARY,
    "search"
);
this.search_entry.set_icon_from_icon_name(
    Gtk.EntryIconPosition.SECONDARY,
    "edit-clear"
);
// Clear the field when the "edit-clear" icon is clicked.
this.search_entry.icon_press.connect((pos, event) => {
    if (pos == Gtk.EntryIconPosition.SECONDARY) {
        this.search_entry.set_text("");
    }
});

// Image and Stack
this.image_stack = new Gtk.Stack();
this.image_view = new Gtk.Image();
this.image_view_loading = new Gtk.ProgressBar();
this.image_view_url = new Gtk.Entry();
this.image_view_url.set_property("editable", false);
this.image_view_url.set_property("can_focus", false);
this.image_view_loading.set_show_text(true);
var image_box = new Gtk.Box(Gtk.Orientation.VERTICAL, 6);
image_box.pack_start(this.image_view);
var image_url_box = new Gtk.Box(Gtk.Orientation.HORIZONTAL, 6);
image_url_box.pack_start(new Gtk.Label("URL:"), false, false, 0);
image_url_box.pack_start(this.image_view_url);
image_box.pack_start(image_url_box, false, false, 0);
this.image_stack.add_named(image_box, "image");
this.image_stack.add_named(this.image_view_loading, "loading");

// Main window box
var window_box = new Gtk.Box(Gtk.Orientation.VERTICAL, 6);
window_box.margin = 6;
window_box.pack_start(this.search_entry, false, false, 0);
window_box.pack_start(this.image_stack);
this.add(window_box);

this.show_all();
this.image_stack.set_visible(false);Phew. A couple things to note:
-
Icons were added to the search field, and in addition, the value of the field should be cleared out when the “clear” icon is clicked.
-
The URL display also uses an
Entry, but has two properties on it set so that it behaves as a read-only field. -
The last line hides the whole stack because we don’t want to show anything until we’ve started searching for our first image.
-
6 is my go-to margin value, but feel free to adjust it to your liking. The human interface guidelines have some suggestions for how far apart to place your widgets.
Here’s what the result of this looks like:
Now we can start listening to signals to update everything accordingly! From a high level, here’s what the app should do, in order of the signal calls that we can expect:
-
search_begin: Show the progress bar and animate it to indicate that activity is happening. -
search_end: If the search failed, show an error; otherwise, start downloading the result. -
download_begin: Update the progress bar’s text to show that we’re downloading, and set its value to 0 (since now we’ll have concrete progress to show). -
download_progress: Update the progress bar. -
download_end: If the download failed, show an error; otherwise, show the image.
In order to avoid putting all of the logic for these events inside the
Window constructor, let’s define some instance methods…
protected void on_search_begin(string tag) {
    ...
}

protected void on_search_end(string? url, Error? error) {
    ...
}

protected void on_download_begin(string url) {
    ...
}

protected void on_download_progress(double percent) {
    ...
}

protected void on_download_end(Gdk.PixbufAnimation? animation, Error? error) {
    ...
}
…and connect the signals to them (this part inside the Window constructor):
/* -- Register Signal Handlers -- */

this.search_begin.connect(this.on_search_begin);
this.search_end.connect(this.on_search_end);
this.download_begin.connect(this.on_download_begin);
this.download_progress.connect(this.on_download_progress);
this.download_end.connect(this.on_download_end);
For the first part, we want to make a distinction between searching and downloading, and when we’re searching, we want the progress bar to animate. GTK progress bars support two modes of operation: when you know the progress, and when you don’t. In this case, we won’t know the progress until we start downloading the image.
We’ll add a new boolean instance variable called searching so that we know when
a search is underway, and so when to animate the progress bar:
protected void on_search_begin(string tag) {
    // Ensure that the image stack is visible.
    if (!this.image_stack.visible) {
        this.image_stack.set_visible(true);
    }
    // Show the "loading" child of the stack; this shows
    // the loading bar and hides the image.
    this.image_stack.set_visible_child_name("loading");
    this.image_view_loading.set_text("Searching...");
    this.searching = true;

    GLib.Timeout.add(100, () => {
        this.image_view_loading.pulse();
        return this.searching;
    });
}
Both progress bar modes require that you call a method on the widget periodically. When
you have a concrete progress value to report, you call set_fraction(),
providing the progress value to display to the user. But when you just want to
animate the bar to indicate activity, you call pulse(). How often you call the
former depends on how frequently you receive updates, and how often you call the latter
is entirely up to you.
The best way to periodically call pulse() is to add a new timeout callback. This
requires providing an interval in milliseconds along with your callback. The callback
function is invoked periodically, using the provided interval, until it returns false.
In the example above, the progress bar will pulse until this.searching is set to
false, which will happen right as we transition to downloading the result. The value
of 100 means that it will pulse 10 times per second; adjusting the value will result
in either a faster or slower animation.
Now we wait until the request has completed, and hand off the result to be downloaded (omitting error display; check out the full source to see how to display a dialog):
protected void on_search_end(string? url, Error? error) {
    searching = false;
    if (error != null) {
        // Display the error and quit early.
        ...
        return;
    }
    this.download_gif.begin(url);
}
Simple enough. The download_gif() method will take care of emitting the next signal:
protected void on_download_begin(string url) {
    this.image_view_url.set_text(url);
    this.image_view_loading.set_text("Downloading...");
    this.image_view_loading.set_fraction(0);
}
Here we set the URL field to show what we’re downloading, and prepare the progress bar
to switch modes. Calling set_fraction(0) hides the “pulse” progress bar, since we’re
now going to be periodically updating the fraction value.
Actually updating the progress bar is almost laughably simple:
protected void on_download_progress(double percent) {
    this.image_view_loading.set_fraction(percent);
}
There’s only one step left, and that’s to display the .gif that we’ve received.
For most images, it’s enough to call .set_from_pixbuf() or equivalent; but we
want our image to animate, so there are a couple extra steps. You’ll notice that
the result of the download is a PixbufAnimation, not just a Pixbuf; in order
to display an animation, we need to iterate through the animation’s frames and
call .set_from_pixbuf() for each one.
To help out, we need to add one last instance variable:
protected Gdk.PixbufAnimationIter gif_iter;And finally, here’s how we take the result and animate it:
protected void on_download_end(
    Gdk.PixbufAnimation? animation,
    Error? error
) {
    if (error != null) {
        // Display the error and quit early.
        ...
        return;
    }
    this.gif_iter = animation.get_iter(null);
    this.image_view.set_from_pixbuf(this.gif_iter.get_pixbuf());
    this.image_stack.set_visible_child_name("image");
    this.animate();
}

protected void animate() {
    var delay = this.gif_iter.get_delay_time();
    if (delay == -1) {
        return;
    }
    if (delay < 20) delay = 20; // Minimum value for GIF images.
    GLib.Timeout.add(delay, () => {
        if (this.gif_iter == null) {
            return false;
        }
        if (this.gif_iter.advance(null)) {
            this.image_view.set_from_pixbuf(
                this.gif_iter.get_pixbuf()
            );
        }
        this.animate();
        return false;
    });
}
This code is short, but dense. The callback itself simply creates our iterator
(freeing any that may already exist, which avoids a memory leak), displays the
first frame of the image, shows it in the stack, and calls animate().
The animate() method works by using the pixbuf’s iterator to do a couple things:
-
Calculate the delay, or how long we need to wait before advancing the image. A value of -1 means that the image is static, and shouldn’t advance. Also note that the GIF image format defines 20 as the minimum delay, so we check for that.
-
Set up a timeout using the delay. This timeout returns
false, ensuring that it is only invoked once. -
When the timeout occurs, advance the iterator and, if necessary, update the image to use the current pixbuf. Note that we also check to make sure the iterator hasn’t been deleted before attempting to use it.
-
After advancing, call
animate()again to set up for the next frame.
(Note: the on_search_begin() function should now also have a line setting
this.gif_iter to null, which stops the animation and frees up some resources)
And that’s it!
Summary
Naturally, there’s a lot of room for improvement. Here are some ideas for improving the app’s functionality:
-
Add cancellation support. While an API request or download is processing, a new search request should abort any pending operations. This can be achieved by using the Cancellable class.
-
Integrate Settings for application configuration, so that the strings currently hard-coded into the
Applicationclass are configurable using existing tools. Bonus: create a simple “settings” dialog for updating these directly from your app. -
Add a Scale widget below the image for adjusting playback speed by using its value to calculate a TimeVal that can be passed to the iterator’s
advance()method. -
This post just covered querying Giphy’s “random” endpoint for images; try adding support for more of their endpoints, and add a ComboBox next to the search field for choosing which one to use. Bonus: for endpoints that return multiple images, figure out a way to scroll through all of the results, downloading each one as it becomes necessary.
Further Reading
-
Valadoc for any general-purpose questions about Vala’s API’s.
-
Widget Gallery, for checking out the available widgets.
-
Human Interface Guidelines, for solid advice on what constitues a good interface.
-
GNOME Developer Center, for many more guides and resources.